|
The following is the record of an exercise, not an actual backgammon game.
Both sides receive the same rolls and move simultaneously. I'll take the
bottom checkers and aim for 7-5-3, but my opponent, normally a strong
player, will not. I can't promise my moves are right, but this will
illustrate why bearing in high is better than spreading out the checkers
evenly in one's home board.
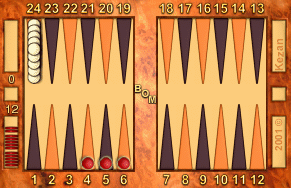
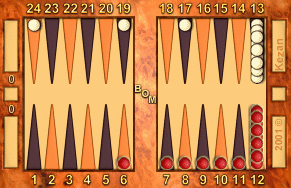
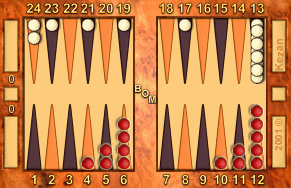
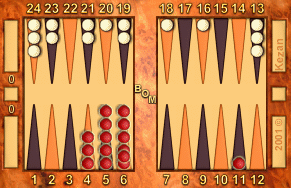
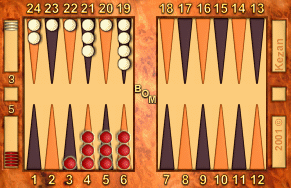
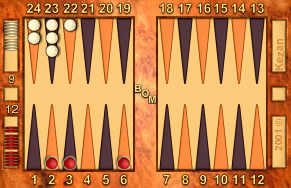
White and red each start
with 15 checkers on their
own twelve point.
|
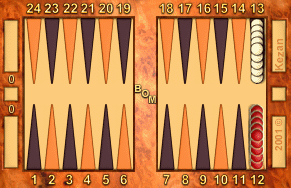 |
Roll #1:
White:
Red:
|
5-4
12/7, 12/8
12/7, 12/8
|
 |
Roll #2:
White:
Red:
|
2-1
7/4
12/11, 12/10
|
 |
Roll #3:
White:
Red:
|
6-3
12/6, 4/1
12/6, 12/9
|
 |
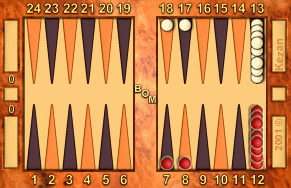
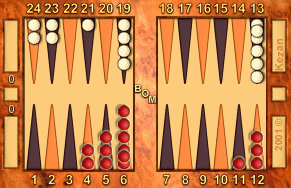
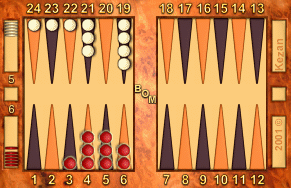
Moving a checker to the ace point is already an error. The best white can hope to do is break even. At worst, white will have to move other checkers to the ace point, perhaps because of a gap on the 4 or 5 point in the bear off, or too many checkers left on the bar point at the end of the bear in. Extra checkers on the ace point are bad.
Meanwhile, I'm happy to unstack rather than get an extra crossover. This will help me make the most efficient use of doubles.
Roll #4:
White:
Red:
|
6-5
8/2, 6/1
12/6, 10/5
|
 |
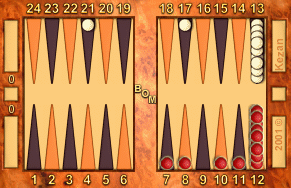
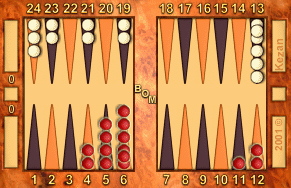
Moving another checker to the ace point is terrible, as is burying a checker on the 8 point rather than unstacking the 12 point.
Roll #5:
White:
Red:
|
4-3
12/5
9/6, 8/4
|
 |
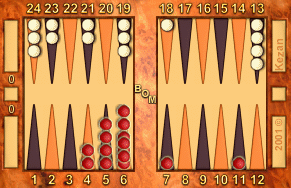
My position is so flexible that it probably doesn't matter what I do. Still, it might have been better to keep unstacking. Playing 12/9 would give me another useful 5, as I would rather not pile checkers up on the bar point.
Roll #6:
White:
Red:
|
5-2
12/7, 12/10
12/5
|
 |
Roll #7:
White:
Red:
|
1-1
10/8, 7/6, 5/4
12/11, 12/10, 7/6
|
 |
Roll #8:
White:
Red:
|
6-6
12/6(3), 8/2
12/6(2), 11/5, 10/4
|
 |
Roll #9:
White:
Red:
|
5-2
6/1, 6/4
12/5
|
 |
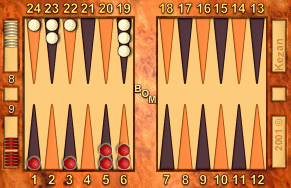
I don't know whether it is the largest error in absolute terms, but sending a third checker to the ace point is hideous. It was in the right place on the 6 point; one would be happy to have 7 checkers on the 6 point in the 7-5-3 position. Also, on the ace point that checker can't be used to fill the gap on the 5 point, which might become a serious problem. Any 5 played to the ace point in the bearoff will be a disaster because there are already too many checkers on the ace point.
Roll #10:
White:
Red:
|
6-5
12/6, 12/7
12/6, 12/7
|
 |
Roll #11:
White:
Red:
|
3-1
12/9, 6/5
7/4, 6/5
|
 |
Roll #12:
White:
Red:
|
4-1
9/5, 7/6
11/6
|
 |
Roll #13:
White:
Red:
|
6-2
12/6, 12/10
6/off, 5/3
|
 |
Roll #14:
White:
Red:
|
6-3
12/3
6/off, 3/off
|
 |
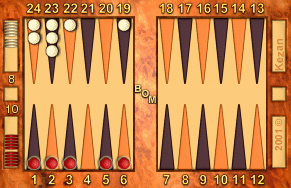
I disagree with plugging the gap on the 3. Gaps on the 3 point are not a problem if you have extra checkers on the 6 point, since a 3 can be played 6/3 in a useful fashion, and even 3-3 plays well. A gap on the 3 point is a problem if you run out of checkers on the 6 point. A gap on the 4 point is bad immediately, since a 4 will miss and still leave a gap.
Roll #15:
White:
Red:
|
6-1
10/4, 1/off
6/off, 4/3
|
 |
Roll #16:
White:
Red:
|
5-2
5/off, 2/off
6/4, 5/off
|
 |
White has rolled a couple of small numbers, clearing off two of the checkers on low points that shouldn't have been there. However, White still has problems because of the two checkers on the ace point and the thinness of the 5 point. If White rolls 2 5's before clearing the 6 point, another checker will probably have to go to the ace point.
Roll #17:
White:
Red:
|
5-1
5/off, 1/off
6/off
|
 |
It would also be reasonable for me to play 5/off, 3/2 or 5/off, 4/3.
Roll #18:
White:
Red:
|
4-4
6/2, 4/off(3)
5/1, 4/off(3)
|
 |
Roll #19:
White:
Red:
|
5-4
6/2, 6/1
6/2, 5/off
|
 |
Oops. Two misses for white. Meanwhile, my position is still smooth, i.e., I am prepared to make good use of almost every roll.
Roll #20:
White:
Red:
|
5-1
6/off
5/off, 1/off
|
 |
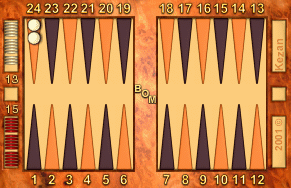
The pipcounts are equal: 11 pips each. Not having enough checkers on the 6 point could easily have lead to falling behind in the race due to the wastage from using large numbers to bear off from low points. However, that's not the only consideration. White has more checkers, and no checkers on high points, so white expects to take longer to bear off for the same pipcount.
Roll #21:
White:
Red:
|
5-5
3/off, 2/off(3)
6/1, 3/off, 2/off, 1/off
|
 |
So, this time, white fell behind by a roll by bearing in too deeply. White's
bearoff was correct, but my guess is that white wasted the equivalent
of about 5 pips by bearing in badly. White had more than a 50% chance to
require an extra roll. Of course, it might not have mattered, and fluke
final rolls might have allowed White to bear off more quickly, but in the
long run White will lose a lot of close races by making these errors. If
the race should be even, white becomes about a 2:1 underdog by playing like
this.
If one tries to close one's board, e.g., 3-3-3-2-2-2 instead of 7-5-3, this
wastes several pips. I would guess that one requires an extra roll just
under half of the time if one aims for a closed board instead of 7-5-3.
There is more information about the 7-5-3 position in the
rec.games.backgamon archives in these two articles.
|